Molded Chocolate Mastery: A Beginner’s Guide to Sweet Success
Chocolate crafting is a delightful art that combines precision, creativity, and a love for sweetness. Whether you’re a novice or an aspiring chocolatier, mastering the art of molded chocolate can be a rewarding experience. This beginner’s guide will walk you through the essentials of creating beautiful and delicious molded chocolates that will impress your friends and family.
1. The Basics of Molded Chocolate
Molded chocolates are created by pouring tempered chocolate into molds to set. The process involves a few key steps: selecting quality chocolate, tempering, molding, and finishing. Here’s how to get started.
Choosing the Right Chocolate
Quality chocolate is crucial for achieving the best results. Look for couverture chocolate, which has a higher cocoa butter content, making it ideal for molding and tempering. Some popular brands include Valrhona, Callebaut, and Guittard.
Essential Tools and Equipment
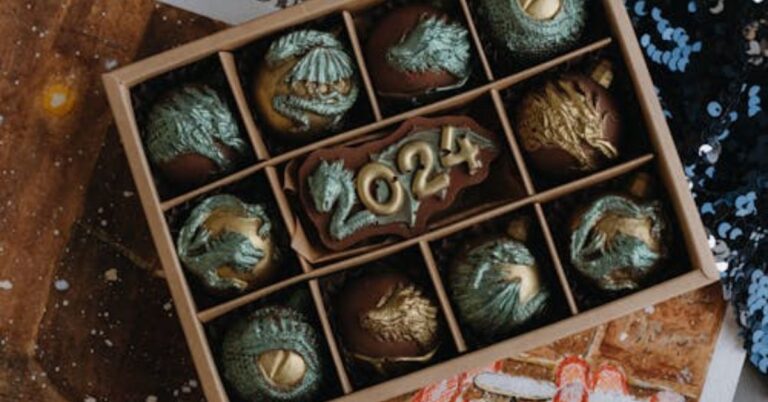
- Chocolate Molds: Available in various shapes and sizes, from simple squares to intricate designs. Polycarbonate molds are preferred for their durability and ability to produce a glossy finish.
- Double Boiler or Microwave: For melting chocolate gently.
- Candy Thermometer: To ensure precise temperature control during tempering.
- Spatulas and Scrapers: For spreading and leveling chocolate.
- Pastry Brush: For adding decorative touches or layers.
2. The Art of Tempering Chocolate
Tempering chocolate is the process of heating and cooling chocolate to stabilize the cocoa butter crystals. This ensures your chocolates have a shiny finish and a satisfying snap.
Step-by-Step Tempering
- Melting: Chop your chocolate into small, even pieces. Melt 2/3 of the chocolate in a double boiler or microwave until it reaches 110-115°F (43-46°C).
- Cooling: Remove from heat and add the remaining 1/3 of the chocolate. Stir continuously until the chocolate cools to 80-82°F (27-28°C).
- Reheating: Gently reheat the chocolate to 88-90°F (31-32°C) for dark chocolate, or 86-88°F (30-31°C) for milk and white chocolate. Be careful not to exceed these temperatures.
3. Molding Your Chocolate
Once your chocolate is tempered, it’s time to create your molded masterpieces.
Filling the Molds
- Preparation: Ensure your molds are clean, dry, and free from any residue.
- Pouring: Fill the molds with tempered chocolate. Tap the mold gently on the counter to remove air bubbles.
- Scraping: Use a scraper to remove excess chocolate from the surface of the mold.
- Setting: Allow the chocolate to set at room temperature or refrigerate for a quicker set. Avoid freezing as it can cause the chocolate to bloom (develop a white, streaky appearance).
Unmolding
Once the chocolate is fully set, carefully invert the mold and gently tap or flex it to release the chocolates. If tempered correctly, they should pop out easily with a glossy finish.
4. Adding Flavors and Decorations
Enhance your molded chocolates with flavors and decorative touches.
Flavor Inclusions
- Nuts and Fruits: Add chopped nuts, dried fruits, or seeds to your molds before pouring in the chocolate.
- Extracts and Oils: Mix in a few drops of food-safe essential oils or extracts for a burst of flavor.
Decorating Techniques
- Colored Cocoa Butter: Paint the molds with colored cocoa butter before adding chocolate for a vibrant design.
- Luster Dust: Apply luster dust with a brush for a shimmery effect.
- Transfer Sheets: Place a chocolate transfer sheet in the mold before pouring in the chocolate to create intricate patterns.
5. Troubleshooting Common Issues
Even with careful attention, things can sometimes go awry. Here are some common issues and how to fix them:
- Blooming: If your chocolate develops a white, streaky appearance, it’s due to improper tempering or storage conditions. Remelt and retemper the chocolate to fix this.
- Sticking to the Mold: If chocolates don’t release easily, the mold may have been too warm or not dry enough. Ensure molds are cool and dry before use.
- Air Bubbles: Tapping the mold on the counter should help release trapped air bubbles. Using a vibrating table can also be effective.
6. Storing Your Molded Chocolates
Proper storage ensures your chocolates stay fresh and visually appealing.
- Cool and Dry Place: Store chocolates in a cool, dry place away from direct sunlight and strong odors. The ideal storage temperature is between 60-70°F (15-21°C).
- Airtight Containers: Use airtight containers to prevent moisture and odor absorption.
- Avoid Refrigeration: Unless necessary for setting, avoid storing chocolates in the fridge to prevent condensation and blooming.
Read More: The Art of Molded Chocolate: Tips and Techniques for Perfect Creations
Conclusion
Mastering molded chocolate is a blend of science, art, and patience. With the right ingredients, tools, and techniques, you can create stunning chocolates that are as delightful to the eyes as they are to the taste buds. Remember, practice makes perfect, so keep experimenting and enjoy the sweet journey to chocolate mastery!

