The Art of Molded Chocolate: Tips and Techniques for Perfect Creations
Chocolate making is an art that has been honed over centuries. One of the most enchanting forms of this craft is molded chocolate, where creativity meets precision. Whether you’re a novice or an experienced chocolatier, mastering the art of molded chocolate requires understanding the ingredients, techniques, and tools involved. In this blog, we will explore the essential tips and techniques to create perfect molded chocolate every time.
1. Choosing the Right Chocolate
The quality of your chocolate will significantly impact the final product. When selecting chocolate for molding, consider the following:
- Couverture Chocolate: This is the preferred choice for many chocolatiers. It contains a higher percentage of cocoa butter, which provides a smooth texture and shiny finish.
- Dark, Milk, or White Chocolate: Each type has its unique properties. Dark chocolate is rich and less sweet, milk chocolate is creamy and sweet, and white chocolate is the sweetest with a creamy vanilla flavor.
2. The Importance of Tempering
Tempering is the process of heating and cooling chocolate to stabilize it for making candies and confections. Properly tempered chocolate has a glossy finish and a crisp snap. Here’s a step-by-step guide to tempering:
- Melting: Melt the chocolate slowly to avoid burning. You can use a double boiler or a microwave. For a double boiler, heat water in the lower pot and place the chocolate in the upper pot, stirring continuously.
- Cooling: Once melted, cool the chocolate by adding small pieces of unmelted chocolate (seed method) or by spreading it on a cool marble slab (tabling method). Stir until the chocolate reaches the appropriate temperature.
- Reheating: Gently reheat the chocolate to working temperature: around 88°F to 90°F (31°C to 32°C) for dark chocolate, 86°F to 88°F (30°C to 31°C) for milk and white chocolate.
3. Preparing Your Molds
Clean and dry molds are crucial for achieving a flawless finish. Here are some preparation tips:
- Polish: Use a soft cloth to polish your molds. This removes any residue and helps to achieve a shiny surface.
- Temperature: Ensure molds are at room temperature. Cold molds can cause the chocolate to set too quickly and may result in a dull finish.
4. Pouring and Filling
Pouring the chocolate into molds requires a steady hand and patience. Follow these steps for the best results:
- Pouring: Slowly pour the tempered chocolate into the molds, filling them to the brim. Tap the mold gently on the counter to remove air bubbles.
- Scraping: Use a bench scraper or a spatula to remove excess chocolate from the surface of the mold.
- Filling with Centers: If making filled chocolates, pour a thin layer of chocolate, let it set slightly, then add the filling. Finally, cover it with more chocolate.
5. Cooling and Setting
Proper cooling is essential for molded chocolates to be set correctly.
- Room Temperature Setting: Allow the chocolate to set at room temperature in a cool, dry place. Avoid placing molds in the refrigerator as it can cause condensation, leading to sugar bloom.
- Unmolding: Once the chocolate is completely set, gently tap the molds on the counter. The chocolates should be released easily. If not, give them more time to set.
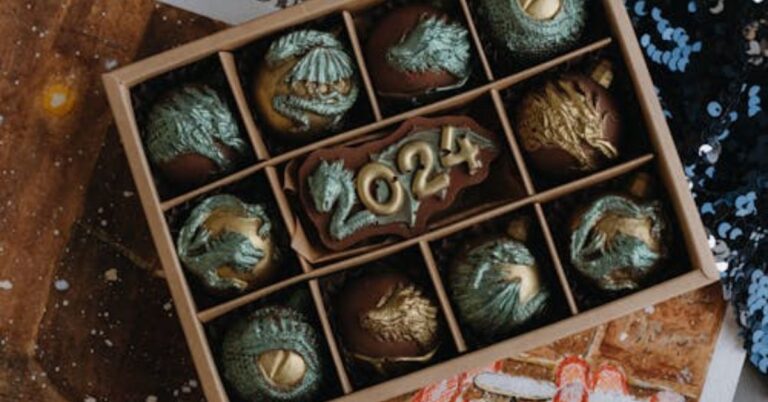
6. Decorating and Finishing Touches
Decoration can elevate your molded chocolates from simple treats to elegant confections.
- Airbrushing: Use an airbrush with edible colors to add intricate designs.
- Luster Dust: Brush edible luster dust onto chocolates for a metallic sheen.
- Transfers and Stencils: Apply transfer sheets or stencils to create patterns and logos on the chocolates.
7. Troubleshooting Common Issues
Even with the best techniques, problems can arise. Here are some common issues and solutions:
- Bloom: If you see white streaks (sugar or fat bloom), it indicates improper tempering or storage. Ensure chocolate is tempered correctly and stored in a cool, dry place.
- Sticking to Molds: This can happen if the molds are not clean or properly tempered. Ensure thorough cleaning and proper tempering before use.
- Bubbles: Air bubbles can mar the appearance of chocolates. Tap the mold gently after pouring it to release the trapped air.
Read More: Molded Chocolate Mastery: A Beginner’s Guide to Sweet Success
Conclusion
Creating perfect molded chocolates is a rewarding endeavor that combines science, precision, and artistry. By understanding the importance of high-quality ingredients, mastering tempering, and following meticulous techniques, you can create stunning chocolates that delight the eyes and taste buds. Whether for personal enjoyment or professional creations, these tips and techniques will help you on your journey to becoming a master chocolatier. Happy chocolate making!